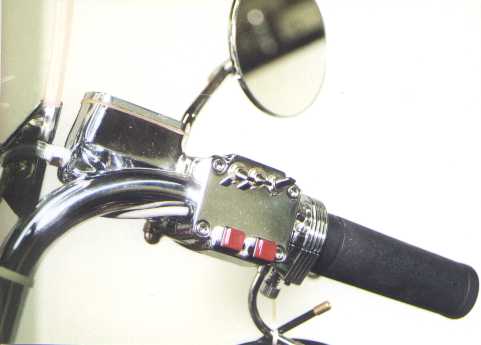
Since I only have the one control on the handlebars and I didn't want to drill the new co-ed chrome dash and headlight like I had the old stock ones, I had to figure out a way to cram everything into the brake side switch cover. I bought a plain one and did some experimenting. This is (ahem) the second one I bought, I still have another for a spare. The chrome didn't flake that bad when drilled, the secret is sharp drills, and hiding rough edges with washers and grommets.
Clockwise from top left: spotlight toggle, hazard toggle, directional toggle (center off), horn pushbutton, 3mm LED for high beam indicator, headlight hi/lo alternating pushbutton.
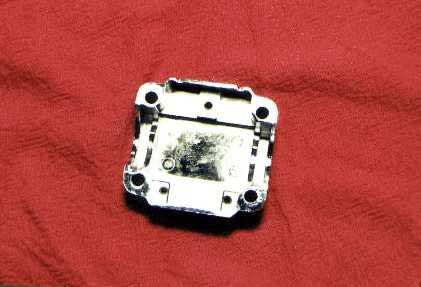
In case you didn't know, when you buy a plain cover the mounting bosses for the stock switches are still cast on the inside. That's why the one in the picture above is my second attempt. I got the first drilled out, then realized I hadn't made provisions for the spotlight switch. This, by the way, is a photo of the spare.
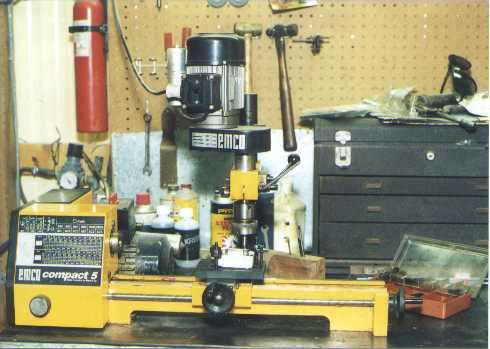
If you don't have room or money (mainly money) for a big lathe and milling machine, this little modelmaker's setup is a jewel. Don't let it's size fool you, it's very well built and precise. Just the thing for milling out a handlebar switch cover, turning a one of a kind spacer, or fabricating that full-auto sear for a last minute gift for a friend...
JUST KIDDING! I'm an FFL holder and I don't need the BATF coming around... although they're welcome... er, maybe I should just shut up...